1.先决条件
无论什么方式安装,都需要先初始化数据库,这里我选择了在本地通过 Docker 启用一个 mysql 5.7
docker run -d \\
  --name mysql \\
  -p 3306:3306 \\
  -e MYSQL_ROOT_PASSWORD=xyzj1a2y3 \\
  -e TZ=Asia/Shanghai \\
  mysql:5.7
启动以后,可以通过数据库管理软件进行连接 localhost:3306 用户名和密码都是 root。
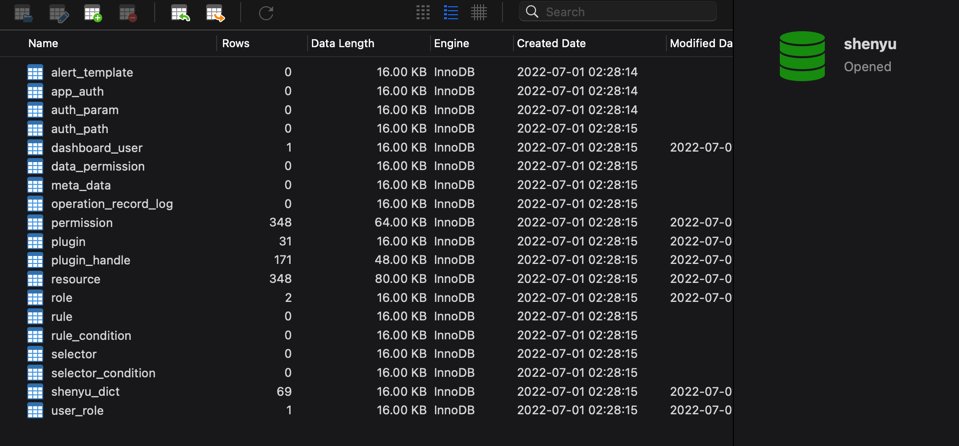
然后根据文档执行 mysql 数据库初始化,我是直接通过数据库管理软件执行的 sql。执行成功以后创建一个 shenyu 数据库,并且会创建一些表并插入必须数据。

2.本地部署
文档:https://shenyu.apache.org/zh/docs/deployment/deployment-local
Clone 代码到本地
git clone https://github.com/apache/incubator-shenyu.git
cd incubator-shenyu
mvn clean install -Dmaven.javadoc.skip=true -B -Drat.skip=true -Djacoco.skip=true -DskipITs -DskipTests
配置 Mysql
cd shenyu-admin/src/main/resources
application-mysql.yml:
# Licensed to the Apache Software Foundation (ASF) under one or more
# contributor license agreements.  See the NOTICE file distributed with
# this work for additional information regarding copyright ownership.
# The ASF licenses this file to You under the Apache License, Version 2.0
# (the \"License\"); you may not use this file except in compliance with
# the License.  You may obtain a copy of the License at
#
#     http://www.apache.org/licenses/LICENSE-2.0
#
# Unless required by applicable law or agreed to in writing, software
# distributed under the License is distributed on an \"AS IS\" BASIS,
# WITHOUT WARRANTIES OR CONDITIONS OF ANY KIND, either express or implied.
# See the License for the specific language governing permissions and
# limitations under the License.

shenyu:
  database:
    dialect: mysql
    init_enable: true

spring:
  datasource:
    url: jdbc:mysql://localhost:3306/shenyu?useUnicode=true&characterEncoding=utf-8&useSSL=false&serverTimezone=Asia/Shanghai&zeroDateTimeBehavior=convertToNull
    username: root
    password: xyzj1a2y3
    driver-class-name: com.mysql.cj.jdbc.Driver
启动 ShenYu Admin
使用 IDE 启动 org.apache.shenyu.admin.ShenyuAdminBootstrap 并配置参数 --spring.profiles.active = mysql。
启用 ShenYu Bootstrap
使用 IDE 启动 org.apache.shenyu.bootstrap.ShenyuBootstrapApplication
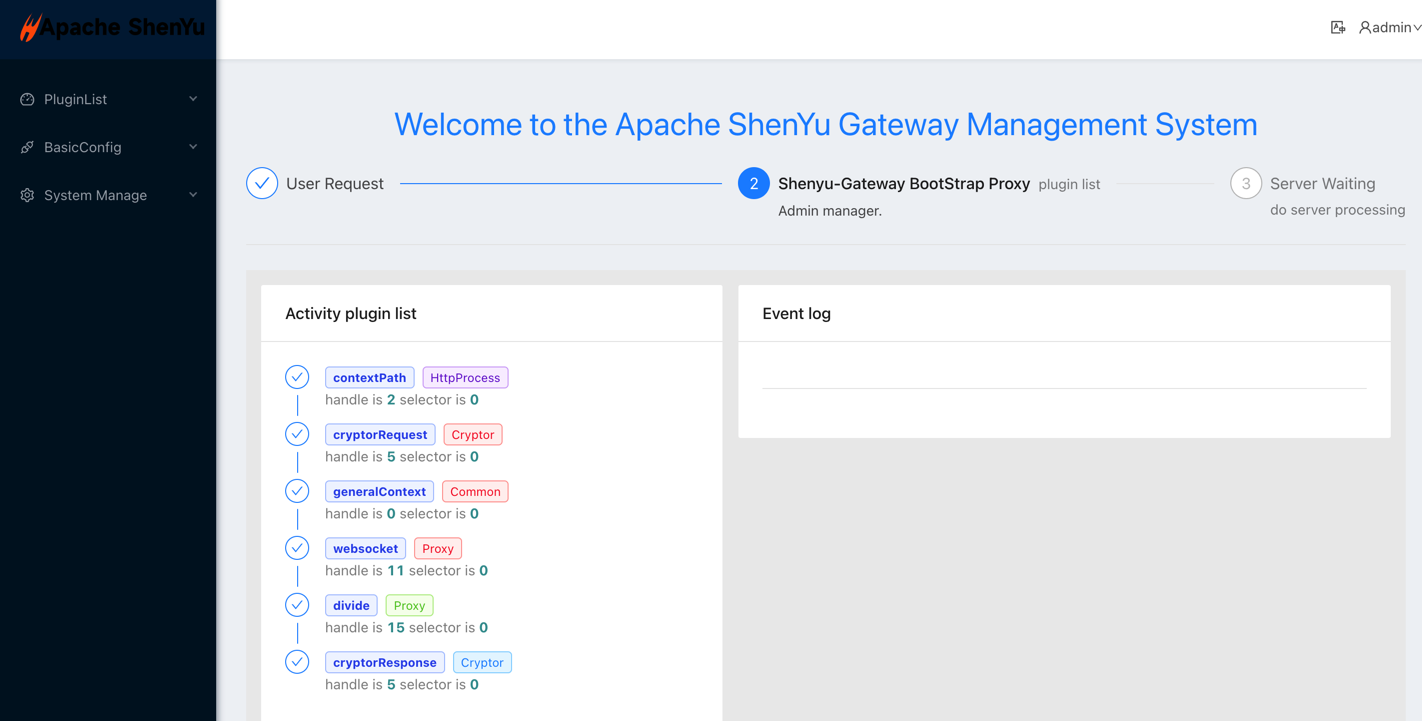
访问 Admin
访问 http://localhost:9095 ,默认用户名密码分别为 admin 和 123456

3.运行测试
ShenYu 提供了多方方式接入网关,直接在 UI 操作,通过 client 接入,client 又分为 http、nacos、zookeeper 等等。这里我是用了 client http 的方式接入。
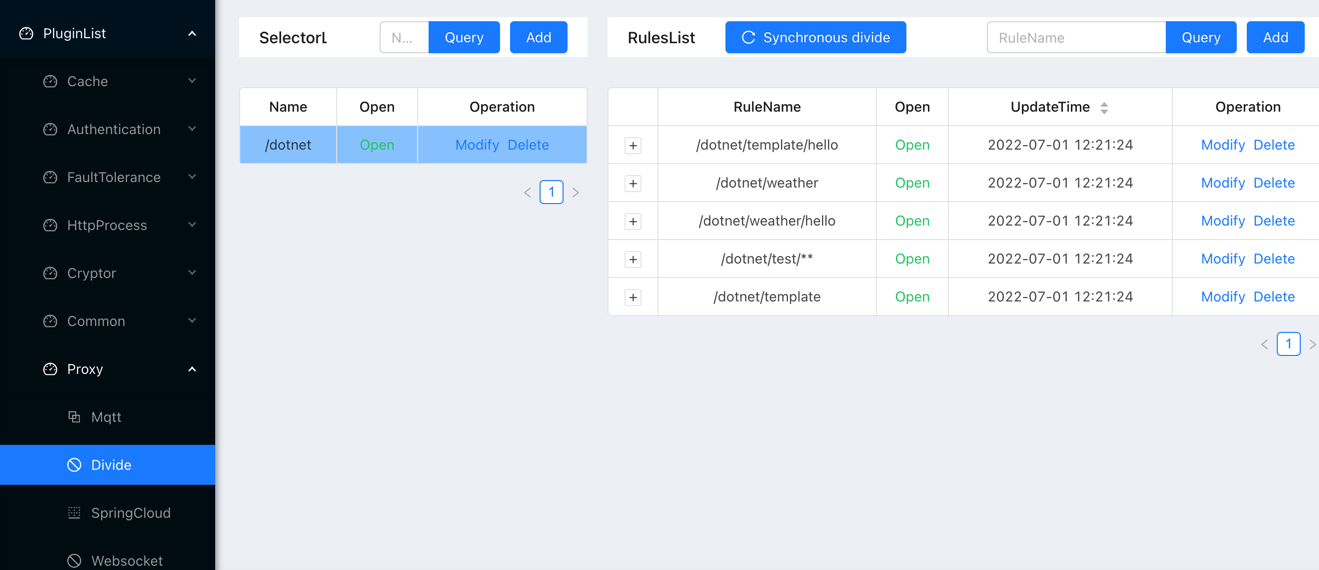
我运行的是 dotnet client 仓库提供的 example,注册成功后可以在 Admin 界面查询到 selector 信息:

然后采用 postman 调用测试,需要注意的是 9095 端口是 admin 端口,9195 才是网关的端口:

可以看到成功进行了调用
独立博客:https://xcmaster.com/posts/64946.html
目前学习.NET Core 最好的教程 .NET Core 官方教程 ASP.NET Core 官方教程
.NET Core 交流群:923036995 欢迎加群交流
如果您认为这篇文章还不错或者有所收获,您可以点击右下角的【推荐】支持,或请我喝杯咖啡【赞赏】,这将是我继续写作,分享的最大动力!
作者:晓晨Master(李志强)
声明:原创博客请在转载时保留原文链接或者在文章开头加上本人博客地址,如发现错误,欢迎批评指正。凡是转载于本人的文章,不能设置打赏功能,如有特殊需求请与本人联系!
来源:https://www.cnblogs.com/stulzq/p/16435077.html
本站部分图文来源于网络,如有侵权请联系删除。
 百木园
百木园